by Bethany Institutions | Mar 24, 2026
Whether you’re planning a road trip, tracking your morning run, or solving a physics problem, understanding the relationship between speed, distance, and time is a fundamental skill. These three concepts are deeply interconnected: if you know two of them, you can always find the third. Learning the time-speed-distance formula helps simplify many everyday calculations and physics problems.
This guide will walk you through the formulas, provide clear examples, and share handy tricks to master these calculations.
Understanding the Relationship Between Speed, Distance, and Time
At its core, the relationship is simple and logical. Speed is how fast something is moving, Distance is how far it has traveled, and Time is how long it took.
Many students first learn this concept through the time and distance formula, which connects these three quantities in a simple mathematical relationship.
The Core Formula
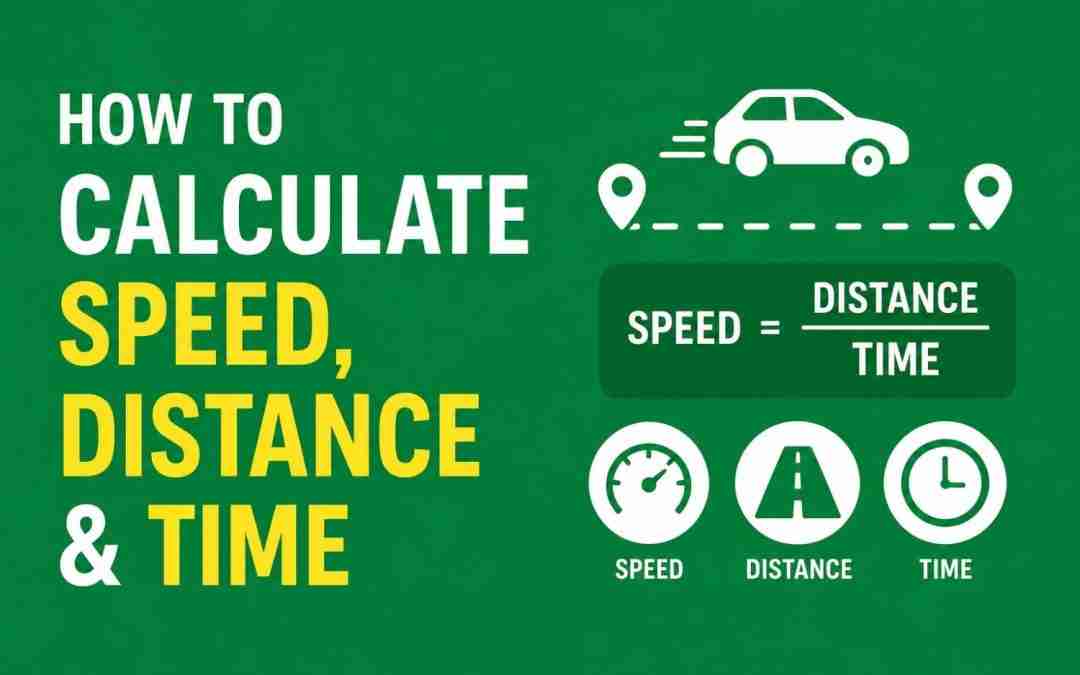
What is the formula of speed? The connection is captured by this single, powerful formula, which can be rearranged in three ways:
- Speed = Distance ÷ Time
- Distance = Speed × Time
- Time = Distance ÷ Speed
Why It Matters
This trio of formulas isn’t just for textbooks. We use the speed calculation formula constantly in daily life for:
- Travel Planning: Figuring out how long a journey will take.
- Vehicle Tracking: Monitoring fuel efficiency and average speed.
- Sports: Measuring an athlete’s performance over a set distance.
- Physics Problems: Understanding the basics of motion.
How to Calculate Speed
Speed is the rate of covering a distance. It tells us the distance traveled per unit of time. The following three steps will show you how to find speed with distance and time
Step 1: Note down the total distance covered and the total time taken.
Step 2: Apply the formula: Speed = Distance ÷ Time
Step 3: Always include the correct units (e.g., km/h, m/s, mph).
Example: A car travels 80 miles in 4 hours. What is its speed?
- Speed = 80 miles ÷ 4 hours = 20 miles per hour (mph)
| Distance | Time | Formula | Speed |
| 80 miles | 4 hours | 80 ÷ 4 | 20 mph |
| 150 km | 3 hours | 150 ÷ 3 | 50 km/h |
How to Calculate Distance
Distance is the total ground covered while moving at a constant speed for a certain time.
Formula: Distance = Speed × Time
Example: A cyclist rides for 2 hours at a constant speed of 6 km/hr. How far do they travel?
- Distance = 6 km/hr × 2 hours = 12 kilometers
Tip: Before calculating, ensure your speed and time units are compatible (e.g., don’t use km/h with minutes without converting first).
How to Calculate Time
Time is the duration it takes to cover a distance at a given speed.
Formula: Time = Distance ÷ Speed
Example: A runner covers 5 km at a steady speed of 2 km/hr. How long does it take?
- Time = 5 km ÷ 2 km/hr = 2.5 hours
Note: If your answer is a decimal like 2.5 hours, remember that 0.5 hours is 30 minutes. So, the time would be 2 hours and 30 minutes.
Unit Conversion Tips
Consistent units are critical for accurate calculations. Here are the most common conversions.
| Conversion | Formula |
| km/h → m/s | Multiply by 5/18 (or divide by 3.6) |
| m/s → km/h | Multiply by 18/5 (or multiply by 3.6) |
| miles/hr → km/hr | Multiply by 1.609 |
💡 Pro Tip: Always convert all measurements to the same unit system before you start your calculation to avoid errors.
The Triangle Method (Easy Memory Trick)
This method helps students quickly remember the speed distance time worksheet problems often given in maths practice exercises.
This method helps students quickly remember the speed, distance, and time worksheet problems often given in maths practice exercises.
🧠 How to use the DST Triangle:
- Cover the variable you want to find with your finger.
- The remaining visible parts show you the formula.
- To find Distance (D), cover D. You see S × T.
- To find Speed (S), cover S. You see D over T, so D ÷ T.
- To find Time (T), cover T. You see D over S, so D ÷ S.
Average Speed Concepts
Sometimes a journey involves traveling at two different speeds. In such cases, students often ask how to calculate average speed when two speeds are given.
When the same distance is covered at two different speeds, the formula used is called the formula of average speed when distance is same, which is:
Average Speed = (2 × Speed₁ × Speed₂) ÷ (Speed₁ + Speed₂)
This formula is commonly used in competitive exams and advanced word problems.
Common Mistakes to Avoid
- Mixing Units: Using kilometers for distance and seconds for time will give a nonsensical answer for speed. Convert everything first!
- Ignoring Time Conversions: Forgetting to convert minutes to hours (e.g., 30 minutes = 0.5 hours).
- Rounding Too Early: Rounding numbers in the middle of a calculation can lead to an inaccurate final answer. Only one round at the end.
- Incorrect Unit Symbols: Writing “hrs” instead of the standard “h” for hours or “m” (which could be meters or minutes) instead of “mi” for miles.
Real-Life Applications
These calculations are everywhere:
- Navigation Apps: Calculating your ETA based on current speed and traffic.
- Logistics & Delivery: Estimating package delivery times.
- Athletics: A coach calculating a runner’s average speed over 100m.
- Aviation: Pilots calculating fuel requirements based on flight time and speed.
- Astronomy: Measuring the immense distances between stars and the time it takes for their light to reach us.
FAQ Section
How do you calculate speed in km/h and m/s?
Calculate speed using Speed = Distance ÷ Time. If you have the answer in m/s and need km/h, multiply by 18/5 (or 3.6). To convert from km/h to m/s, multiply by 5/18.
What’s the easiest way to remember the formulas?
The DST Triangle is the easiest memory trick. Cover the variable you want to find, and the arrangement of the other two gives you the formula.
Can I use these formulas for non-linear motion?
No. These formulas only work for constant (uniform) speed. If the speed is changing (accelerating or decelerating), you need the principles of calculus or specific equations of motion from physics.
How do I convert hours to minutes or seconds for time?
Remember: 1 hour = 60 minutes and 1 hour = 3600 seconds. To convert hours to minutes, multiply by 60. To convert minutes to hours, divide by 60.
Why does unit consistency matter in speed problems?
Speed is defined as distance over time (e.g., km/h). If the units are mismatched (e.g., km and minutes), the result will not represent a true speed and will be incorrect. Consistent units ensure the calculation is physically meaningful.
by Bethany Institutions | Nov 10, 2025
Step 1 – Learn Basic Circuit Symbols
Before you start drawing, it’s important to understand the standard BIS/IEC electrical symbols used in diagrams. These help anyone reading your circuit know exactly what each part represents.
Common Symbols and Their Meanings
| Component | Symbol Description |
| Wire | A straight line representing a conducting path for current. |
| Electric Cell / Battery | One or more pairs of long and short lines; the longer line shows the positive terminal. |
| Resistor | A zigzag or rectangular box symbol showing resistance in the circuit. |
| Light Bulb (Lamp) | A circle with a filament (cross or loop) inside. |
| Switch (Open / Closed) | Open: a gap in the line; Closed: a line connecting both ends. |
| LED (Light Emitting Diode) | A diode triangle with arrows pointing outward, showing light emission. |
| Ground | A set of three lines decreasing in size, showing the connection to earth. |
Tip Box: Use standard IEC or BIS symbols for clarity and accuracy. Avoid inventing or modifying shapes.
Step 2 – Plan the Layout of Your Circuit
Now that you know your symbols, plan your circuit before you draw. This will help you maintain a clean, logical layout.
Arrange Components Logically
- Place the power source (battery or cell) on the left side.
- Let the current flow from left to right.
- Arrange components like switches, bulbs, and resistors in a line or neat pattern.
- Keep equal spacing between symbols so the circuit looks balanced.
Follow Neatness Rules
- Use only straight horizontal and vertical lines.
- Avoid diagonal or overlapping wires.
- Keep connections at right angles for a tidy look.
Step 3 – Draw the Components and Connect Them
Once your layout is clear, start drawing the actual circuit diagram.
Place Symbols First
Begin by placing the battery on the left, then add other symbols like a switch, resistor, or bulb in sequence. This makes it easy to connect them later.
Connect with Straight Lines
- Use a ruler for perfect straight lines.
- Connect the symbols with wires meeting at right angles.
- Avoid unnecessary bends or curves.
Check for a Closed Loop
- Every circuit should form a complete path — from the positive terminal to the negative terminal of the battery.
- A closed circuit allows current to flow and light up the bulb.
- An open circuit has a gap (open switch), so the current cannot flow.
Step 4 – Label All Components
Labelling makes your diagram clear and easy to understand.
Add Component Names and Values
- Label each part: battery, switch, bulb, resistor, etc.
- Include values where needed, such as voltage (V), resistance (Ω), or current (A).
Tip Box: Always use SI units when labelling your components.
Example – Simple Circuit with Battery, Switch, and Bulb
Let’s put it all together!
Step-by-Step Example
- Draw the battery symbol on the left.
- Add a switch in the middle.
- Place the bulb symbol on the right.
- Connect all with straight lines to form a closed loop.
- Label each component clearly.
When the switch is closed, current flows from the positive terminal, through the bulb, and back to the negative terminal. The bulb glows, indicating a closed circuit.
If the switch is open, the circuit breaks and the bulb stays off.
Key Rules and Best Practices
To make your circuit diagrams both clear and correct, follow these golden rules:
- Never use curved or slanted lines.
2. Always close the circuit loop.
3. Keep your layout simple and logical.
4. Use correct component symbols.
5. Maintain equal spacing between parts.
Tip Box: Neatness and clarity make your circuit easy to read and understand.
Common Mistakes to Avoid
Even experienced students make small errors while drawing circuits. Here’s what to watch out for:
- Changing the shape of standard symbols (for example, drawing a triangle for a bulb).
2. Disconnected wires or crossed lines without proper junctions.
3. Forgetting to label symbols with their names or values.
4. Using uneven spacing or slanted lines that make the circuit look messy.
Real-Life Applications
Circuit diagrams are not just classroom exercises — they’re used everywhere!
- In school labs: To connect components safely during experiments (like lighting a bulb using a cell and switch).
- In electronics: To plan circuits for radios, fans, or lights.
- In engineering projects: To design complex systems with resistors, capacitors, and transistors.
- In homes: For domestic wiring diagrams that show how switches, fans, and sockets are connected.
Learning how to read and draw circuit diagrams is the first step towards understanding how electrical systems work in the real world.
Summary
Drawing a circuit diagram is not about art — it’s about clarity. Using BIS symbols ensures everyone understands the components and connections in your circuit.
A well-drawn diagram shows:
- Where current flows (input → process → output).
- How components connect in sequence.
- Which parts control or use electricity.
With these steps, you’ll be able to draw any electrical circuit diagram — from a simple bulb setup to a complex multi-resistor network — neatly and confidently.
FAQs
1. Why do we use standard symbols in circuit diagrams?
Standard BIS or IEC symbols help ensure that everyone — from students to engineers — can read and understand the circuit easily.
2. What are the basic rules of drawing a circuit diagram?
Use straight lines, standard symbols, neat labels, and ensure the circuit is closed. Avoid curves, overlaps, or uneven spacing.
3. How do you show current flow direction?
Use arrows to indicate the current moving from the positive terminal of the battery to the negative terminal.
4. What is the difference between open and closed circuits?
In an open circuit, there’s a break or gap (like an open switch), so current doesn’t flow. In a closed circuit, current flows freely and the bulb lights up.
5. Which software can be used to draw circuit diagrams?
You can use tools like Fritzing, Tinkercad Circuits, EdrawMax, or even Microsoft Visio to create neat digital circuit diagrams.
by Bethany Institutions | Oct 8, 2025
The Core Difference: kVA vs. kW
kVA (Kilovolt-Ampere) represents Apparent Power — the total power supplied by the utility or a generator (Volts × Amps). It indicates the total demand placed on the electrical system.
kW (Kilowatt) is Real Power. It is the actual power that does useful work, such as powering motors, producing light, or generating heat.
In simple terms:
- kVA = Total power supplied
- kW = Useful power consumed
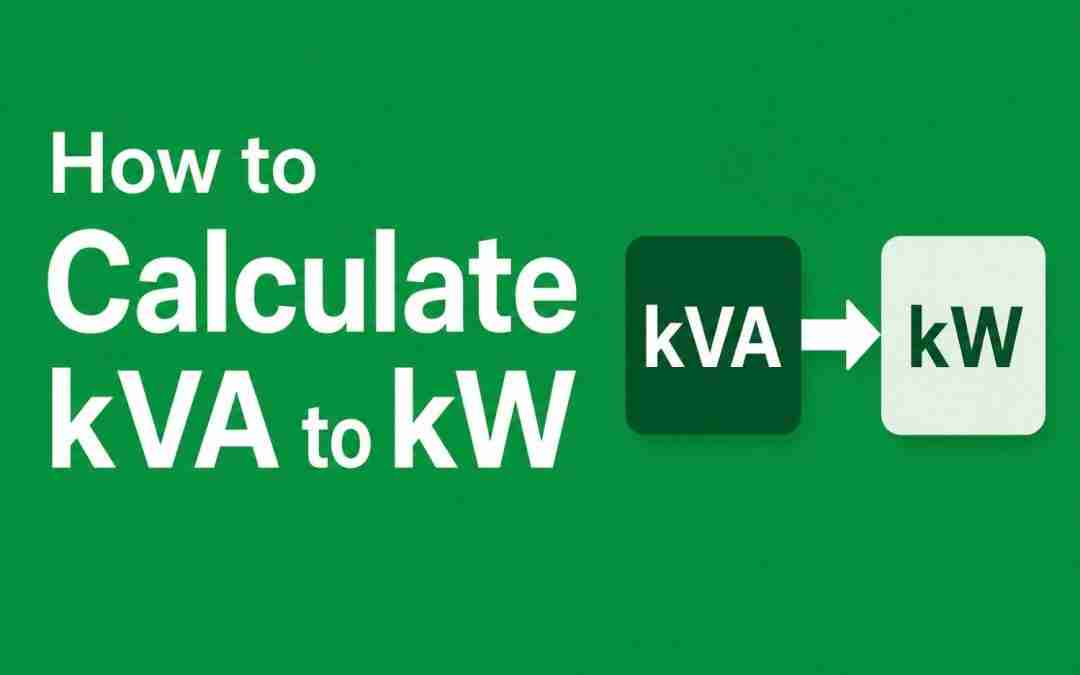
Understanding the difference between kVA vs kW is the first step in learning how to convert kVA to kW.
The Conversion Formula
The formula to convert kVA to kW is:
kW=kVA×PFkW = kVA \times PFkW=kVA×PF
Where:
- kW = Kilowatts (real power)
- kVA = Kilovolt-amperes (apparent power)
- PF = Power Factor
The Power Factor (PF) is a number between 0 and 1 that measures how efficiently electrical power is being used.
A higher power factor means the electrical system is using power more efficiently.
How Much kVA Is 1 kW?
Many students ask, how much kVA is equal to 1 kW?
To convert kW to kVA, use this formula:
kVA=kWPFkVA = \frac{kW}{PF}kVA=PFkW
If the power factor is 0.8:
kVA=10.8=1.25 kVAkVA = \frac{1}{0.8} = 1.25\ kVAkVA=0.81=1.25 kVA
So:
- 1 kW = 1.25 kVA at PF = 0.8
- 1 kW = 1 kVA at PF = 1.0
This answers common search queries such as:
- 1 kW to kVA
- how much kVA in 1 kW
- kw kva
1 kW to kVA Conversion Table
| 1 kW | 1.0 | 1 kVA |
| 1 kW | 0.9 | 1.11 kVA |
| 1 kW | 0.8 | 1.25 kVA |
| 10 kW | 0.8 | 12.5 kVA |
| 100 kW | 0.8 | 125 kVA |
Step-by-Step Calculation
- Identify the kVA rating.
- Find the power factor.
- Multiply kVA by the power factor.
Example
A generator has a rating of 50 kVA and a power factor of 0.9.
kW=50×0.9=45 kWkW = 50 \times 0.9 = 45\ kWkW=50×0.9=45 kW
The real usable power output is 45 kW.
50 kVA in kW
Many people search for 50 kVA in kW.
The answer depends on the power factor:
At PF = 0.8:
50×0.8=40 kW50 \times 0.8 = 40\ kW50×0.8=40 kW
kVA to kW Calculator (The Principle)
You do not always need an online kVA to kW calculator. Simply use:
kW=kVA×PFkW = kVA \times PFkW=kVA×PF
| 10 | 0.8 | 8 kW |
| 25 | 0.9 | 22.5 kW |
| 100 | 1.0 | 100 kW |
| 150 | 0.85 | 127.5 kW |
kW Calculation Formula
The standard kW calculation formula is:
kW=kVA×PFkW = kVA \times PFkW=kVA×PF
This formula converts apparent power to real power.
Why Transformers Are Rated in kVA, Not kW
Transformers are rated in kVA because their heating depends on voltage and current, not on the load power factor.
Since manufacturers do not know the power factor of the connected load, transformers are rated based on apparent power rather than real power.
kVA to kWh Conversion
kWh measures energy used over time.
Formula:
kWh=kVA×PF×TimekWh = kVA \times PF \times TimekWh=kVA×PF×Time
Example
A 10 kVA load runs for 5 hours with a PF of 0.85.
10×0.85×5=42.5 kWh10 \times 0.85 \times 5 = 42.5\ kWh10×0.85×5=42.5 kWh
kVA Calculation Formula
Single-Phase System
kVA=Volts×Amps1000kVA = \frac{Volts \times Amps}{1000}kVA=1000Volts×Amps
Three-Phase System
kVA=Volts×Amps×31000kVA = \frac{Volts \times Amps \times \sqrt{3}}{1000}kVA=1000Volts×Amps×3
This is the standard kVA calculation formula used in electrical engineering.
1 kV to kW – Are They the Same?
No, 1 kV to kW is not a valid direct conversion.
- kV (kilovolt) measures voltage.
- kW (kilowatt) measures power.
To calculate kW, you also need:
- Current (Amps)
- Power Factor
So voltage alone cannot be directly converted to kilowatts.
Common Mistakes to Avoid
- Forgetting the power factor
- Assuming kW = kVA
- Using a power factor greater than 1
- Confusing kVA and kW
- Assuming the power factor is always constant
Conclusion
Understanding how to convert kVA to kW helps students build a strong foundation in electricity and power calculations.
Once you know the formula:
kW=kVA×PFkW = kVA \times PFkW=kVA×PF
You› can easily solve questions such as:
- 1 kVA to kW
- 50 kVA in kW
- Convert kVA to kW
- How much kVA is 1 kW?
This concept is widely used in generators, transformers, electrical systems, and energy calculations.
FAQs
Q1. One kVA is equal to how many kW?
There is no fixed answer. It depends on the Power Factor. 1 kVA is equal to 1 kW only if the Power Factor is 1. For a typical PF of 0.8, 1 kVA would be equal to 0.8 kW.
Q2. The power factor in an AC circuit is given by?
The power factor is given by the cosine of the phase angle (θ) between the voltage and current waveforms.
PF = cos θ
It is also the ratio of Real Power to Apparent Power: PF = kW / kVA.
Q3. What is kVA?
kVA (Kilovolt-Ampere) is the unit of Apparent Power. It represents the total power flowing in an AC circuit, combining both the real power (kW) and the reactive power (kVAR).
Q4. Is kVA to kV the same?
No. kVA (Kilovolt-Ampere) is a unit of power. kV (Kilovolt) is a unit of voltage. They measure different things and are not directly convertible.
Q5. How much kVA is 1 kW?
At PF = 0.8, 1 kW = 1.25 kVA.
Q6. What is 50 kVA in kW?
At PF = 0.8, 50 kVA = 40 kW.
Q7. What is the kW calculation formula?
kW = kVA × PF.
Q8. Can kV be converted directly to kW?
No. You need voltage, current, and power factor to calculate kilowatts.